September 2014-A Tour through QuickBooks’ Payroll Setup Tool
Getting QuickBooks ready to process payroll can be a complex, time-consuming process. QuickBooks handles the real grunt work once you’ve done the initial setup, but the time you spend preparing to print your first paycheck can be challenging.
Fortunately, QuickBooks’ payroll setup tool can guide you through the process. Once you’ve signed up for payroll, open the Employees menu and select Payroll Setup.
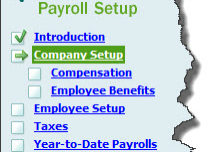
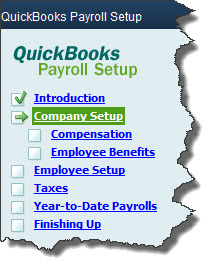
Figure 1: The QuickBooks Payroll Setup tool tells you’ll what information you need to supply in order to start paying employees.
Easy Operations
The first screen you’ll see in this step-by-step, wizard-like setup guide contains a link to QuickBooks’ payroll setup checklist. You don’t have to assemble all of the information you’ll need about your company, your employees, and your payroll taxes, but we recommend that you gather as much as you can before you start.
You’ll advance through setup by completing the information requested and then clicking the Continue button in the lower right (or, sometimes, Next; there’s also a Previous button that’s often available). If you don’t have a particular detail immediately at hand, you can continue on and come back later. You’ll be able to edit your work then.
To back out of the whole process and return at another time, click the Finish Later button in the lower left.
Building a Framework
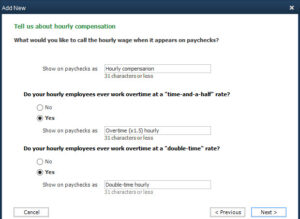
QuickBooks first wants to know about the various types of compensation and employee benefits your company offers. To start adding your Compensation options, click Add New. Click in the box in front of any pay types you support (Salary, Hourly wage and overtime, Commission, etc.) to create a check mark. When you click Next, this window opens:
Figure 2: It’s easy to indicate the types of compensation your company offers.
Keep clicking Next after you’ve completed each screen until you come to a page that lists all of the compensation types you’ve defined. To make any changes, highlight the type and click Edit to modify or Delete to remove. Then click Continue when you’re finished.
The next section is probably the most difficult: Employee Benefits. Here, using similar interface conventions to enter information and navigate, you’ll provide information about your company’s:
- Insurance benefits
- Retirement benefits
- Paid time off, and
- Miscellaneous items (cash advance, wage garnishment, mileage reimbursement, etc.).
It’s absolutely critical that you set these up accurately, or you’ll have unhappy benefits providers – and employees. If you’re not absolutely confident of an answer, it’s better to leave an item unfinished and come back later. You may want to ask us to work with you as you complete this section.
People and Taxes
QuickBooks will then ask you about your employees. Have your W-4 forms handy for this section, as you’ll need to know Social Security numbers, birth dates, etc.
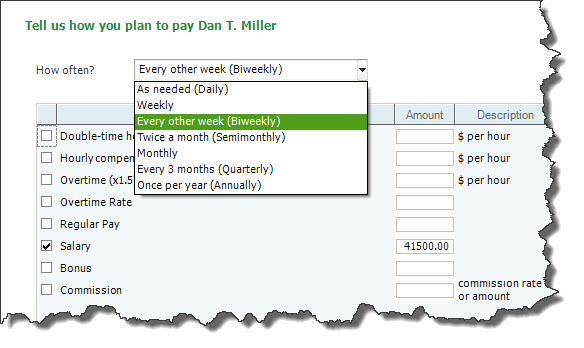
Figure 3: On this screen, you’ll tell QuickBooks what type(s) of compensation and their dollar amounts apply to the employee.
All of those details you entered earlier about company benefits comes into play here. Once you’ve defined an employee’s compensation types and amounts, the next screen will display the additions and deductions that your company supports. You will have set up defaults for some of these, but you can modify them for individual employees.
There are numerous other details that you’ll have to supply for your staff, like how vacation and sick hours accrue, which state will collect taxes from them, and what their filing status is.
Unless you’ve worked with payroll before, you’re going to want our help in completing the payroll tax section. Once it’s done correctly, QuickBooks will calculate taxes due and help you pay them.
Finally, QuickBooks helps you determine whether you’ll need to enter any previous payroll data from the current year before you start to process your payroll in the software.
Whether you’re switching from manual payroll or a payroll service, or simply getting ready to pay your first employee, QuickBooks payroll-processing tools can help you save time and foster accuracy – as long as you get the details right from the start.


