If you plan to have multiple employees using QuickBooks, you can limit their access to specific areas.
Controlling access to your QuickBooks company file is easy when you’re a one-person accounting department. You simply use one password to protect your data.
But when you add new employees to the mix, do you want them to have access to absolutely everything in QuickBooks? Probably not. You have confidence in your employees or you wouldn’t have hired them. But this isn’t solely a matter of trust. It’s just good business practice to restrict individuals to specific areas and responsibilities, no matter what the application.
That’s why QuickBooks has built-in tools to help you limit activity. Here’s how it works.
Identifying Users
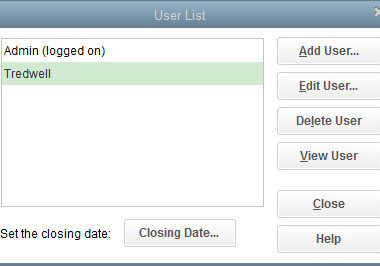
To get started, open the Company menu and scroll down the list to highlight Set Up User Names and Passwords. On the slide-out menu, select Set Up Users. The User List window will open, and you should see your own entry as Admin. Click Add User.
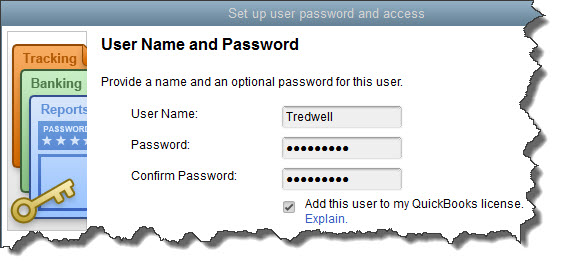
To give an employee access to QuickBooks, enter a User Name for him or her here, then a password.
The Set up user password and access window will open. Fill in those fields and check the box in front of Add this user to my QuickBooks license. This will not be an option if you already have five users, since that’s the maximum number allowed by QuickBooks Pro and Premier. To buy more, open the Help menu and select Manage My License, then Buy Additional User License.
Tip: If you’re not sure how many user licenses you’ve purchased, hit your F2 key and look in the upper left corner. If you’ve maxed out and need more licenses, talk to us about upgrading to QuickBooks Enterprise Solutions.
Click Next. In the window that opens, you’ll define the access level for your new user. Your options here are:
- All areas of QuickBooks,
- Selected areas of QuickBooks, or,
- External accountant (you can grant us access to all areas of the software except for those that contain sensitive customer data, like credit card numbers).
Click the button in front of the second option, then Next.
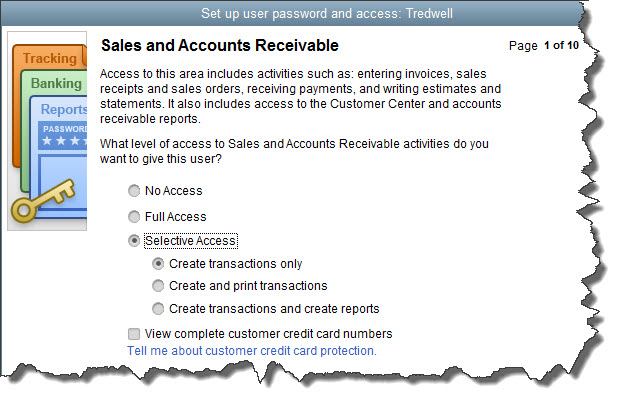
You can specify the access rights for individual employees in numerous areas.
The image above shows the first screen of 10 that display the levels of access available in many individual areas of QuickBooks. Be sure to read the whole page carefully before assigning rights. Here, for example, you’re not just allowing the employee to enter sales and A/R transactions. You’re also deciding whether to grant him or her permission to view the Customer Center and A/R reports. As you can see, your options are No Access, Full Access, and Selective Access (three levels there). Check the box below this list if you want the employee to be able to View complete customer credit card numbers.
When you’re finished there, click Next to specify your similar preferences for Purchases and Accounts Receivable, Checking and Credit Cards, Inventory, Time Tracking, and Payroll and Employees. The next two screens contain more complex concepts, but you’ll follow the same process to express your wishes. They are:
- Sensitive Accounting Activities, like funds transfers, general journal entries, and online banking tasks
- Sensitive Financial Reporting, which allows access to all QuickBooks reports. The option you choose here overrides all other reporting restrictions that you’ve specified for the employee.
Finally, you’ll tell QuickBooks whether this person can change or delete transactions in designated areas, and whether he or she can do so to transactions that were recorded before the closing date (if this applies). The last screen displays a summary of the access and activity rights you’ve given the employee. Check them carefully, and if they’re correct, click Finish.
Housekeeping Options
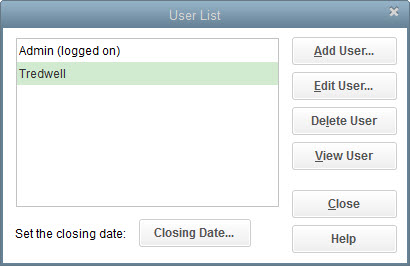
The User List window
QuickBooks then takes you back to the User List window, where you’ll see the employee’s name displayed. If you want to Add, Edit, Delete, or View a user, make sure the correct name is highlighted and click the button for the desired action.
If you’re just now looking to add your first employee to QuickBooks or if you’re starting to outgrow the five-user limit, give us a call. There are more issues to consider when you take on multi-user access. We’d be happy to discuss them with you.


